

Ray Davis, CTP
Summary
I wanted to sync My NetScaler up with the ADM Service. I personally never did it before with the ADM service. I have done this many times with an on-prem ADM setup. I figured I would make a quick Blog on how to do this. It doesn’t look complicated, and sharing it with the community would be good. Note: I have set this up in a lab, and it’s not running in a live production setup. The steps will be the same but around your company’s policies and security guidelines.
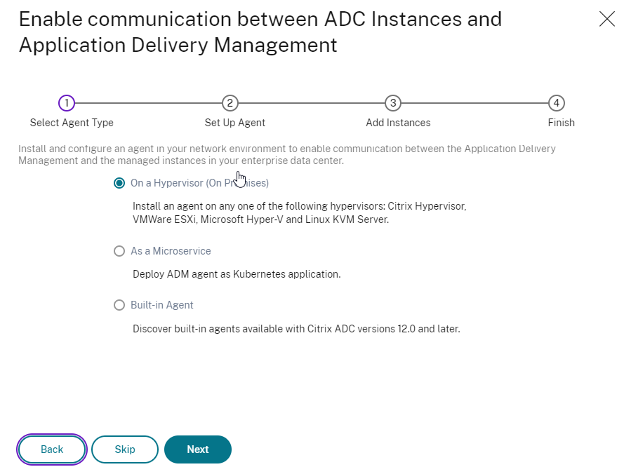
Citrix ADM Agent, the virtual appliance, is available for XenServer, VMWare ESX, Microsoft Hyper-V, and Linus KVM. Nutanix AHV is based on KVM. Running the ADM Agent on AHV seems possible to me. I overlooked that KVM works on AHV. Not sure why, as I now have a couple of NetScalers running on the AHV lab. Jarian reminded me of that. Thanks, man.
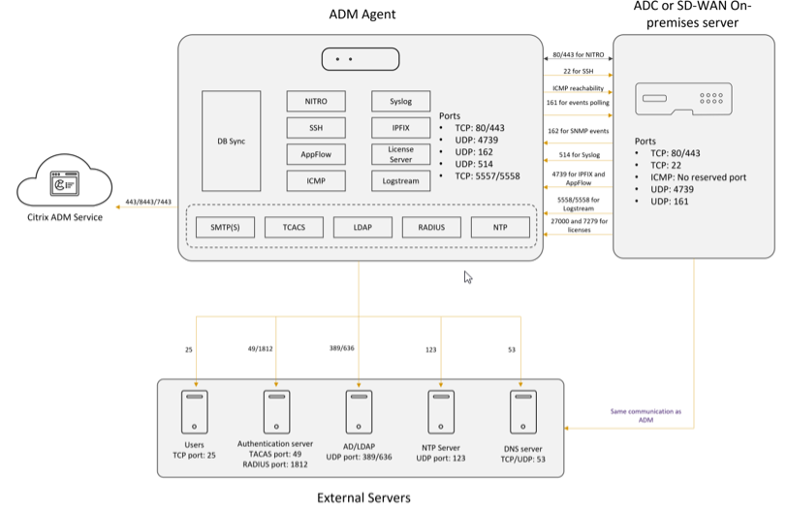
Open the required ports for communications between Citrix ADC instances and Citrix ADM agent or Citrix SD-WAN instances and Citrix ADM agent.
Log into your Citrix cloud account, navigate the “Application Delivery Management” tile, and click manage.

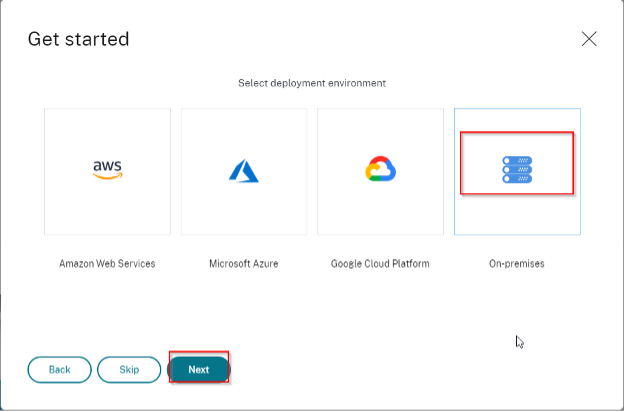
Select “Get Started”

Select “Custom deployment.”

The VPX is on-premises


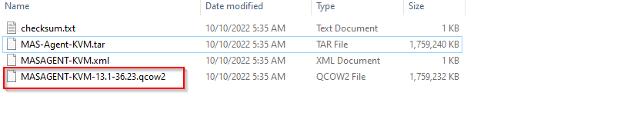
Extract the MAS-Agent-KVM.tgz file

It will then output a MAS-Agent-KVM.tar

Now Extract that to get the “MASAGENT-KVM-13.1-36.23.qcow2”
I am doing this on AHV, which will not cover other hypervisors.
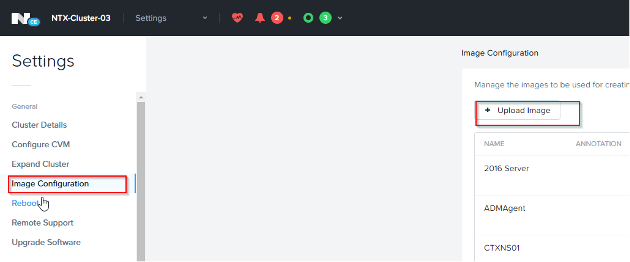
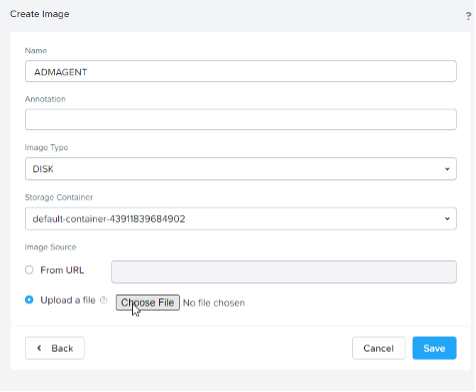
Now, hit the Gear simple in the top right side Click Image configuration, and upload the Image.
Browse
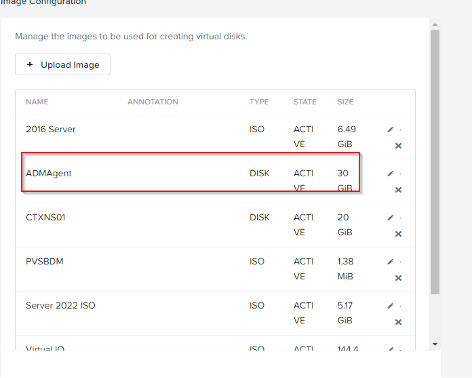
KVM is now Uploaded.
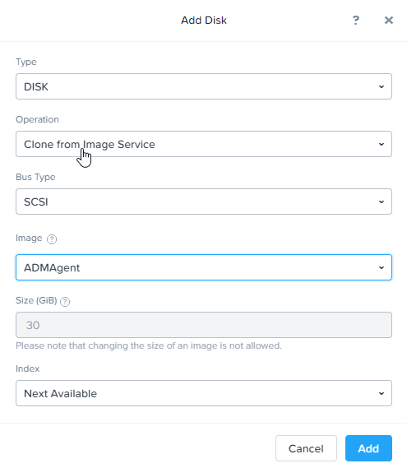
Create a new VM. On the Disk area, click the plus sight and select. Add a disk by cloning from Image Services and selecting your uploaded disk image. Add your NIC for whatever VLAN you use. I have two cores and two sockets, with 4GB of Ram.
Now I remember when I did the for the VPX, I had to run a command to make it bootable.
· acli vm.serial_port_create <VM Name> type=kServer index=0
· acli vm.serial_port_create ADMAgent type=kServer index=0
Putty into the CVM, then paste this
· acli vm.serial_port_create ADMAgent type=kServer index=0

Now boot it up, connect with the console from AHV(Prism Element)
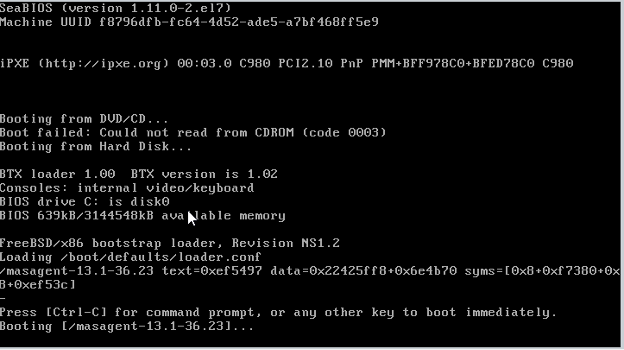
At the login, enter the default login.
· nsrecover and nsroot
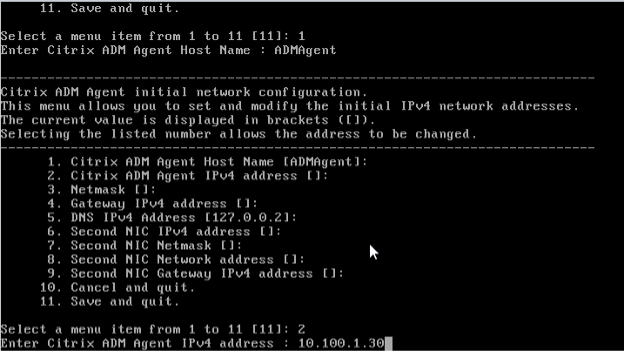
Once logged in, run the networkconfig command
The menu is straightforward. Please enter all the information to get it configured and on the network.
Navigate to mps directory
Run the deployrment_type.py
It will output the Service URL and activation code.


Enter the Service URL and Activation Code from the ADM Service wizard. It will display under “select the type of HyperVisor

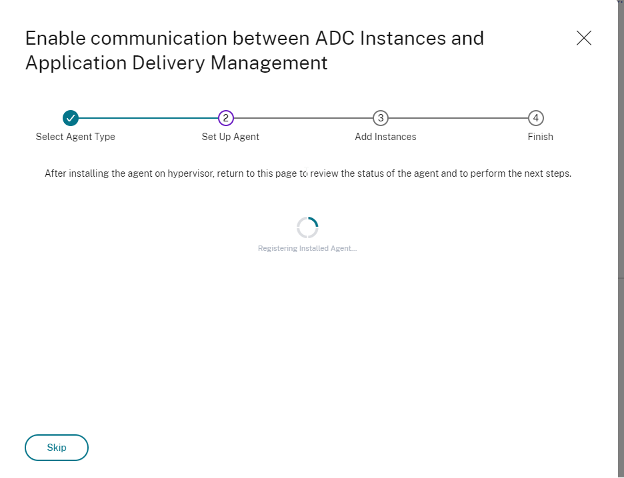
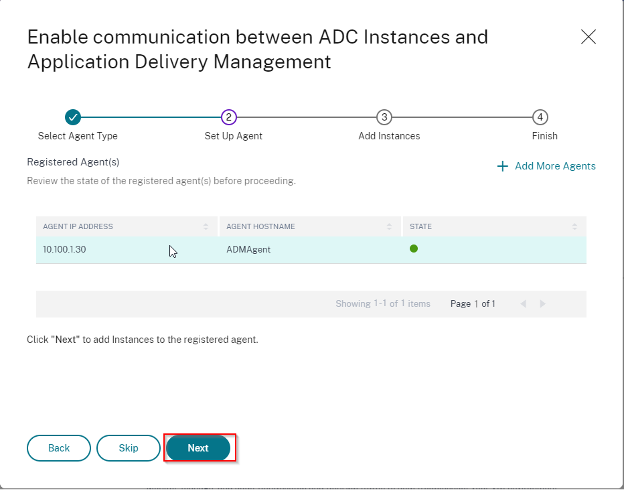
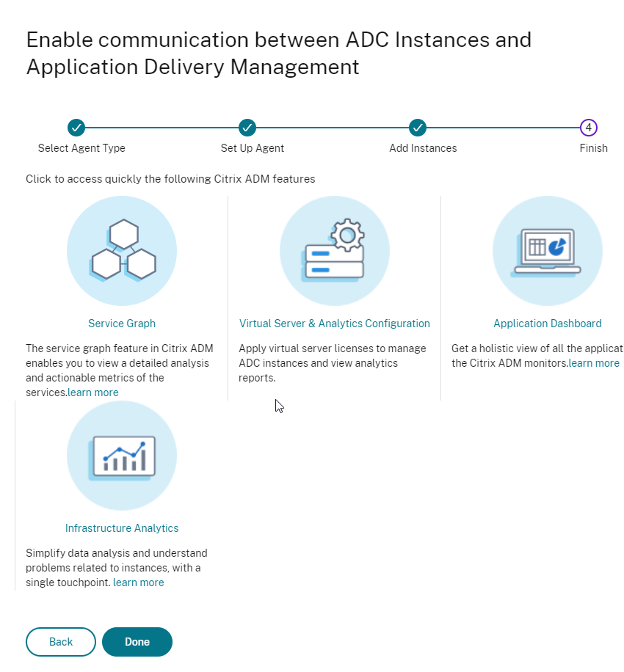
Now go back and click register Agent after completing the CLI part. The ADM Agent will reboot. Please give it about 5 minutes to reboot and come online.
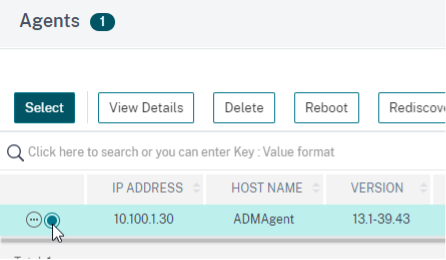
You will notice your Agent IP address will appear.
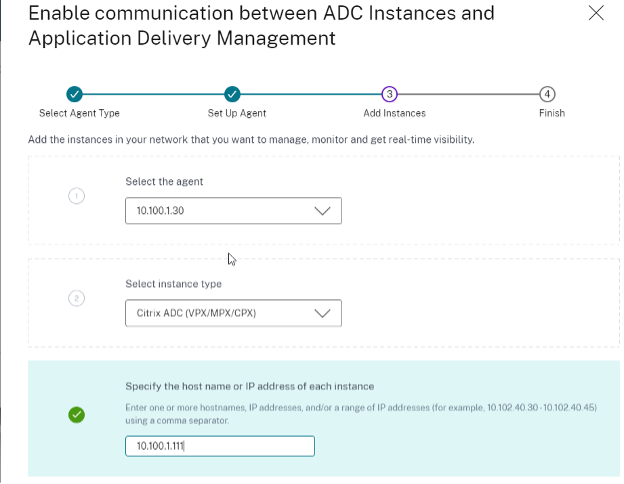
Enable communication by adding the Netscaler Information
Under the authentication profile, click edit. The page will be directed to another area to configure the credentials.

Input your information accordingly to your environment.
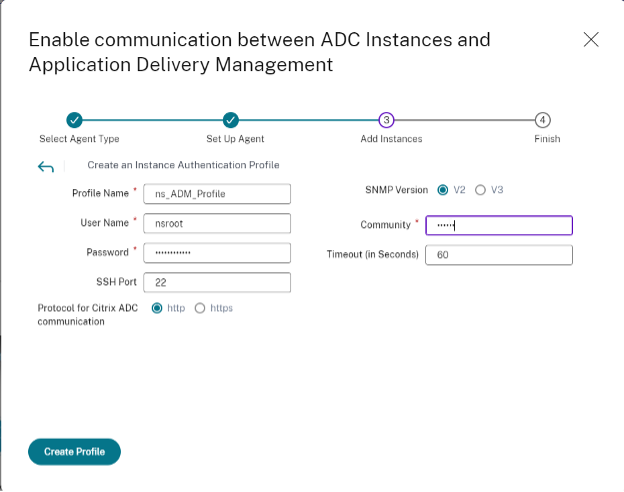
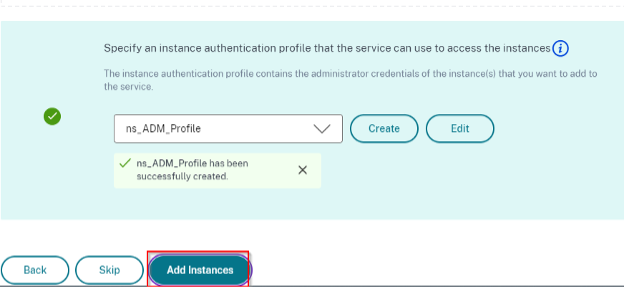
Note: I had to create another profile so the ADM could talk to this. It did not like the default one, which makes sense to me.

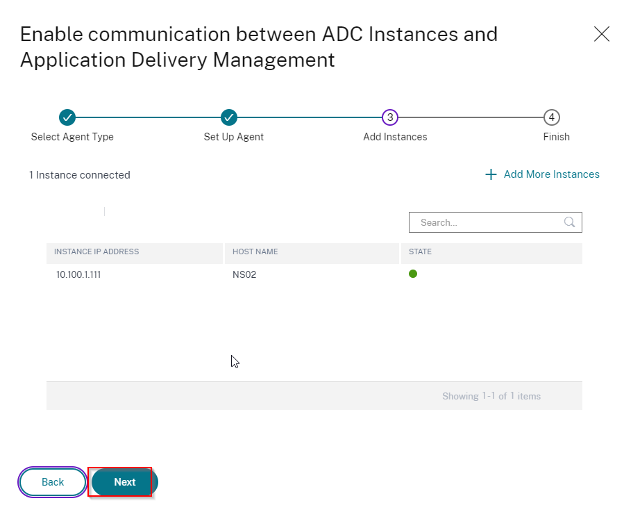
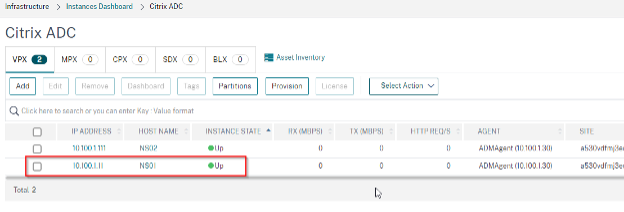
As you can see, it is now two within the ADM service

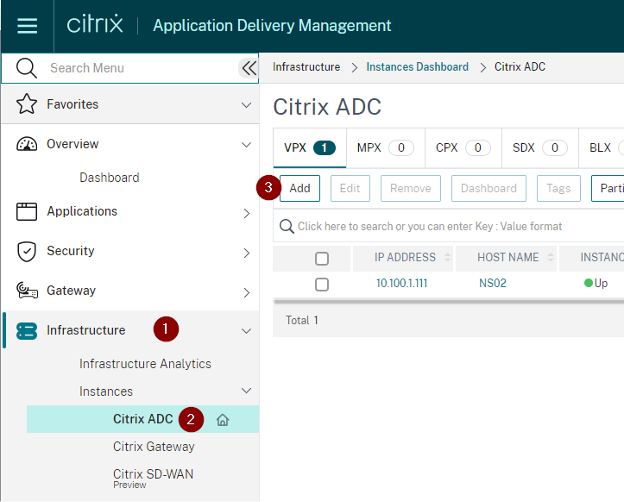
Adding another Netscaler will be a bit simpler.
Have more Netscalers to add? Navigate to Infrastructure > Citrix ADC > Add


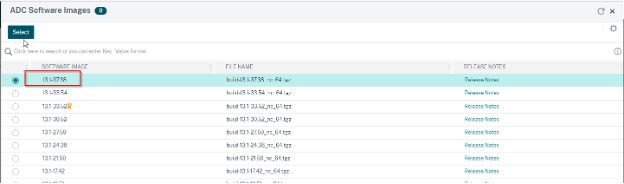
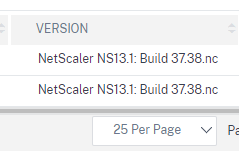
As you can see, the firmware is different. Let’s fix that.

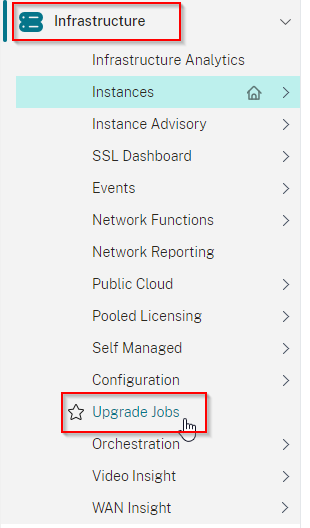
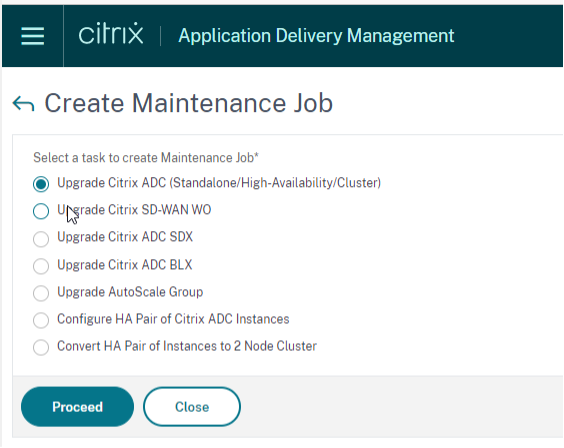
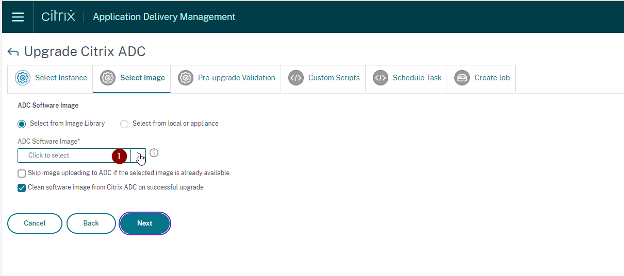
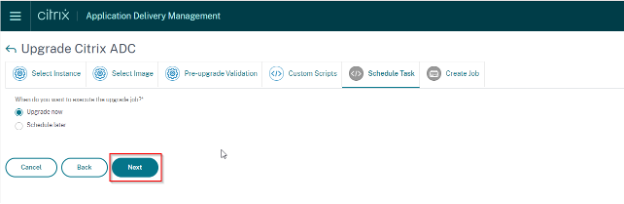
Click on “Create Job”
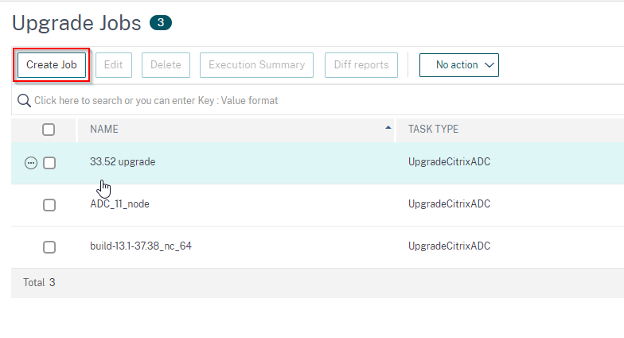


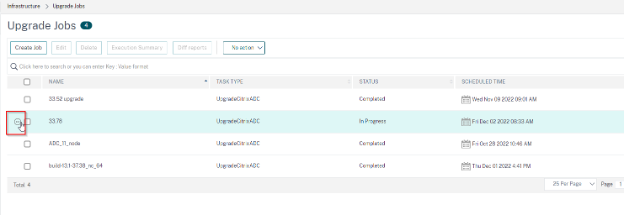
It will take you back to the “upgrade jobs” Page

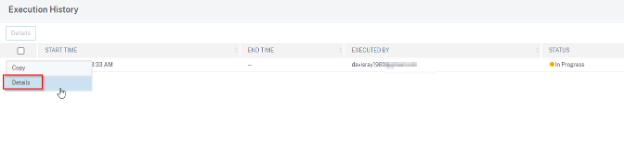
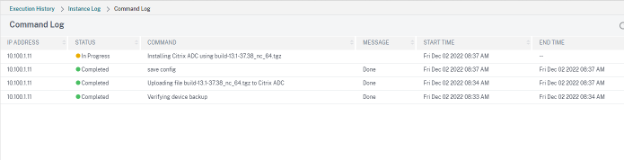
If you want to see what it is doing, click on the circle and click Execution Summary
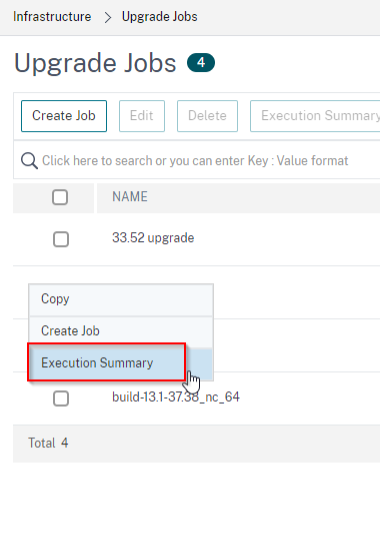
You will see the progress of what is happening. You don’t need to watch it unless you are curious. I set up an email profile to send a report once completed. Note: this is a lab. However, this has been done in a production environment and works well.


The code is now the same
After some time, I let the VPX instance bake. I did this because I wanted to show the neat feature of ADM service for CVEs.
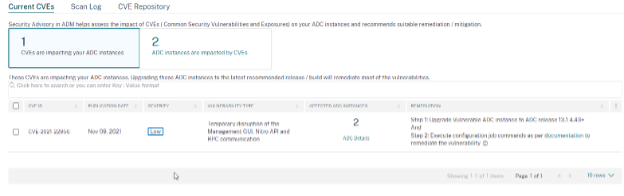
Navigate to > Infrastructure> Instance Advisory>Security Advisory. As you can see below, it picked up that the current VPX I have needs to be patched based on the Low CVE it is reporting on.
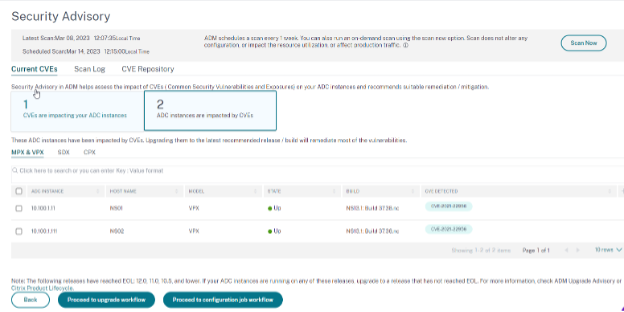
It gives you information on the CVEs

Another cool feature, it shows you the EOL on different Netscaler builds.

That concludes the setup for now. I hope you enjoyed it.